



The Experiment
The Experiments documents three rules-based crypto trading systems, how their performance will be tracked and how they will be improved. Be sure to read this article before diving into The Journal.
The System runs off two fairly basic and straightforward setups. Well, mostly that is...
Each trading system is driven by two setups:
In theory, these are very basic setups that many traders use and in practice...well they're also quite basic.
I'll keep the explanations fairly simple as you probably already know these, but please see the notes on trade management and volume as a bit of a primer for further articles.
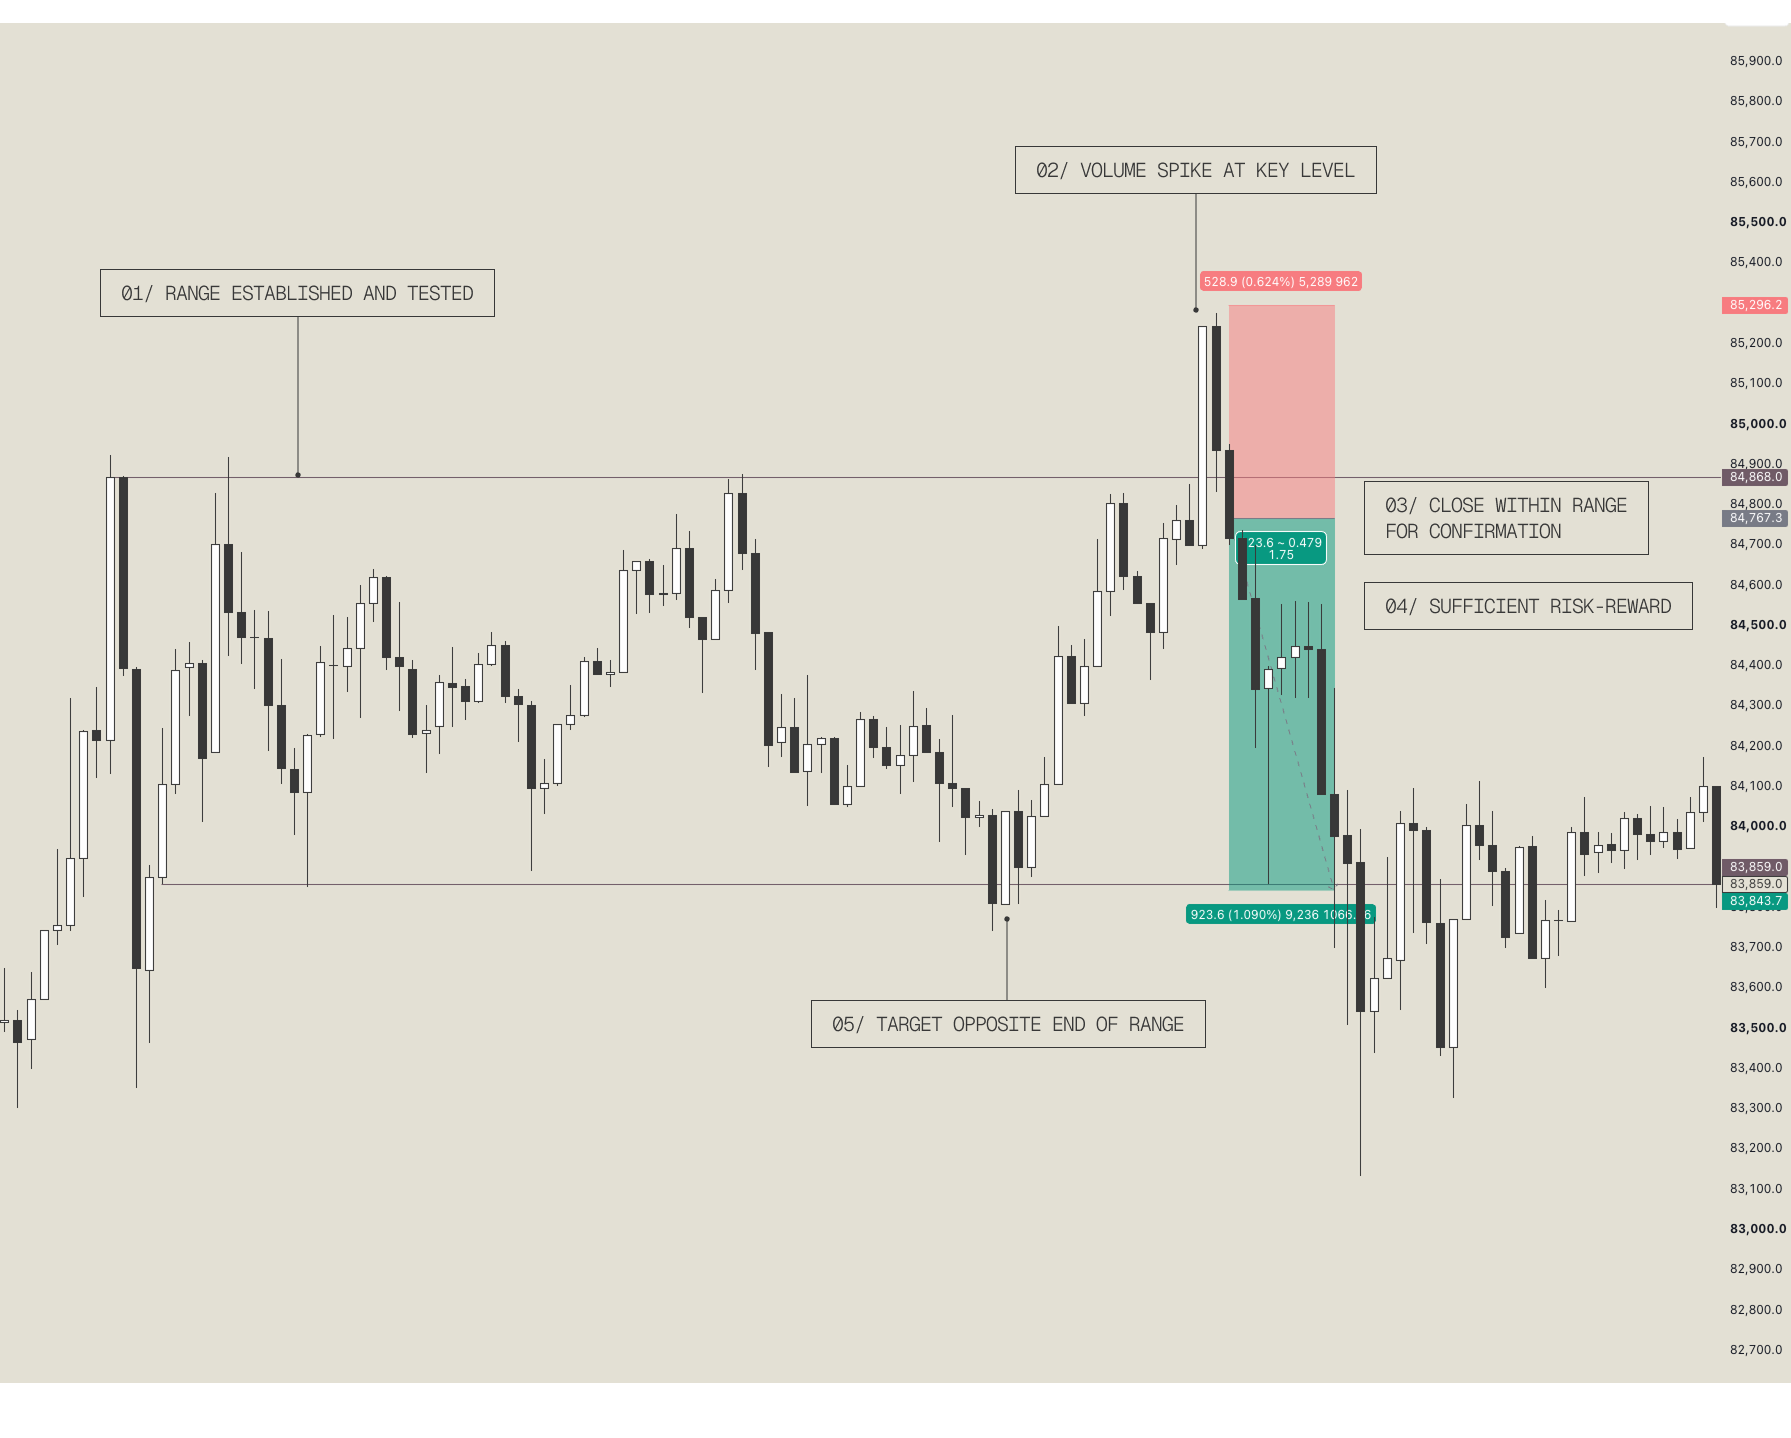
The Mean Reversion setup is essentially your typical support and resistance trade.
BTC is trading within a range, ping-ponging between two key levels. Eventually, price attempts to break through one of these levels but gets rejected.
After being rejected, where does price go? Ideally towards the opposite end of the range. Then we do it all again (hopefully!).
In this setup, I try to enter upon confirmation of the range holding to capture a move to the opposite end of the range and aim for a +1.5R trade.
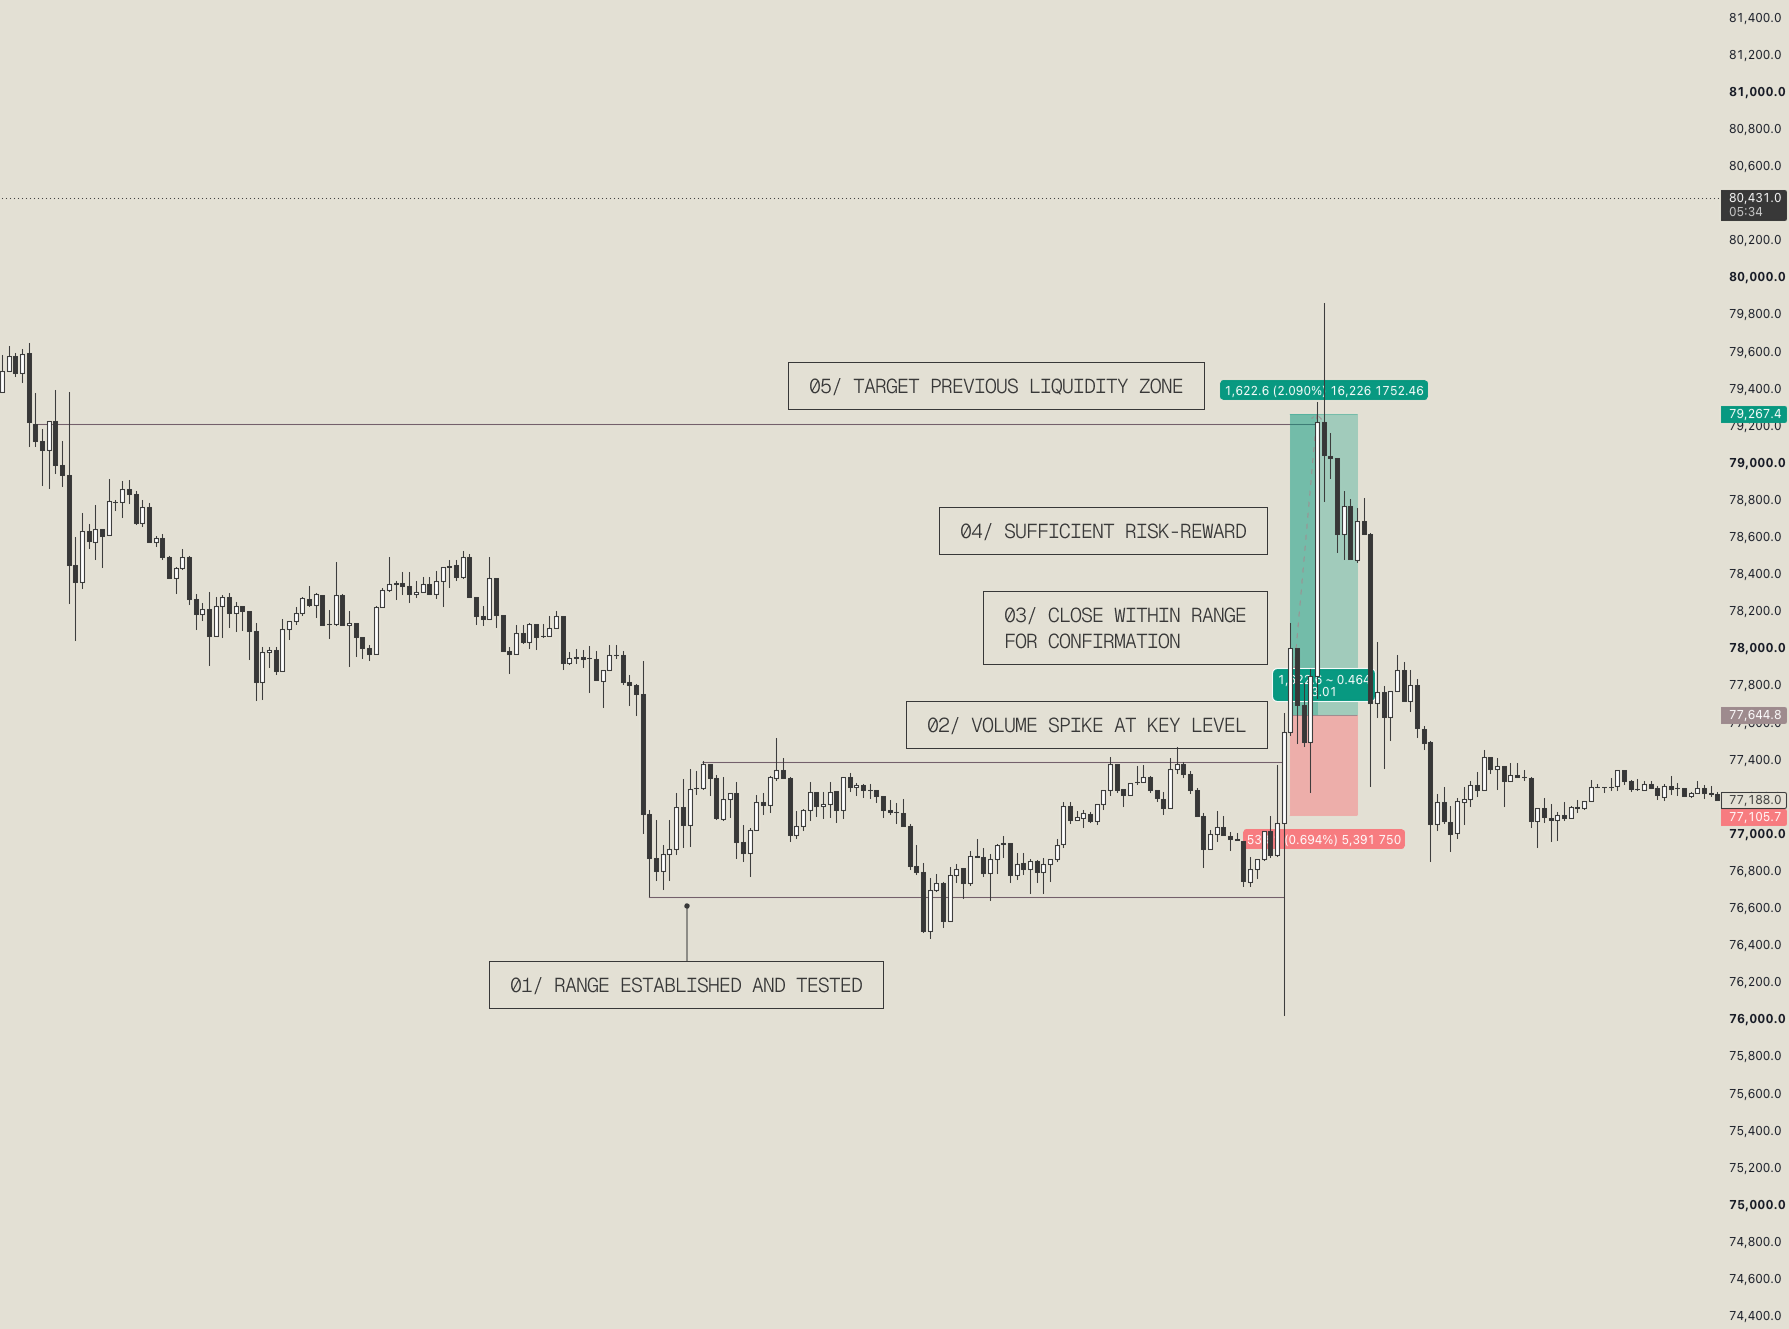
The Breakout setup begins in much the same way that the Mean Reversion play does, but looks for the opposite outcome.
BTC is trading within a range before price reaches a key level and pushes through it successfully. Not only does it push through, but price holds beyond the level and continues moving away from the range…you could say it “breaks out”.
In this setup, I try to enter upon a break of the range being confirmed and to capture the break of range.
For the Breakout setup, target is something to mention. Yes, it breaks out, and when you’re on the right side, it feels good to see price move your way fast, but you do need a target (don’t just smile at your PnL figure).
So where does price go? I generally look for and target an “obvious” liquidity region. A previous swing point, a wick (ideally one that ‘pops’ quite a bit), or otherwise where another range started consolidating at.
Ok, it’s not always crystal clear (neither is trading as a whole). But the idea is to have a target so you can determine if the R target is worth risking for.
The targets for each of the setups are ballpark figures, but in the setup, my entry and stop placement need to give sufficient potential R for the risk. With this system, I won’t take a trade that has a maximum target of +1R or less. And while the reality is that trades do close with less than +1R, the setup has to offer more than +1R at when assessing the entry and stop.
Price can and will chop and react along the way. This is normal and alone, isn’t a reason to straight up exit, panic, or interfere with the trade. Watching price action is a crucial part of trade management, as there is new data and information.
The important thing is to differentiate chop from meaningful price action or order flow data and take appropriate action.
Volume is a crucial part of my trading system.
When looking at a chart, it can seem like there are setups forming all day, everyday. However, I only participate when there is volume spike at a key level.
I have my own pre-defined volume spikes, and will delve into this later on, but for now the main thing you should note is that volume needs to be ‘abnormally’ large for me to want to enter a trade.
Subscribe for more access to journal entries, system notes and more.
Member discussion